
Homemade Creamy Probiotic Yogurt

By making your own yogurt at home, you can ensure that each batch is packed with live probiotics tailored to your needs.
Supports gut health, inflammation, methylation, detoxification, oxidate stress, brain health, and heart health.
This Homemade Probiotic Yogurt inspired by Dr. William Davis’ Super Gut is a simple and effective way to boost your gut health with nutrient-dense ingredients, and it’s quick and easy to make. By using A2 grass-fed or organic cow’s milk, you ensure that the yogurt is rich in high-quality protein, healthy fats, and essential vitamins and minerals like calcium, vitamin D, and vitamin B12. The fermentation process further enhances the yogurt’s nutritional profile, breaking down lactose and proteins, making them easier to digest—especially for those with lactose sensitivity.
The addition of inulin and a small amount of cane sugar serves a dual purpose: inulin acts as a prebiotic, feeding the beneficial bacteria, while the sugar helps bloom the probiotics and offers protection against mold during the fermentation process. These two ingredients play a crucial role in fostering the growth of Lactobacillus and Bifidobacteria, the probiotic strains chosen for their benefits to both gut and cellular health. Lactobacillus helps promote digestive health and can support mood regulation, while Bifidobacteria plays a role in immune function and may even help reduce symptoms of IBS and anxiety.
During fermentation, the probiotics thrive and multiply, producing a yogurt rich in beneficial bacteria. These bacteria support the gut microbiome, which in turn promotes healthy digestion, reduces inflammation, and strengthens the immune system. This yogurt is an excellent source of fermented foods, which contribute to detoxification and the reduction of oxidative stress. It’s also a perfect gluten-free, low-sugar option, fitting into a wide variety of health-conscious diets.
By making your own yogurt at home, you can ensure that each batch is packed with live probiotics tailored to your needs. Whether you’re looking to improve digestion, support cognitive function, or boost your immune health, this homemade yogurt is a delicious and functional addition to your wellness routine.
The Benefits of Specific Bacterial Strains:
Incorporating probiotic strains into yogurt can offer both mental and physical advantages. Here are five strains commonly used in probiotic yogurt, each offering unique benefits:
Lactobacillus rhamnosus GG:
Mental benefit: Known to reduce anxiety and support mood regulation by influencing the gut-brain axis.
Physical benefit: Boosts immune function and balances gut bacteria for better digestion.
Bifidobacterium bifidum:
Mental benefit: Can alleviate symptoms of depression by supporting neurotransmitter production in the gut.
Physical benefit: Eases digestive discomfort and improves the body’s ability to combat harmful bacteria.
Lactobacillus reuteri:
Mental benefit: Boosts oxytocin production, reducing stress and enhancing social bonding.
Physical benefit: Promotes skin and oral health by balancing the microbiome and reducing inflammation.
Lactobacillus casei:
Mental benefit: Reduces stress and improves resilience by supporting gut-brain communication.
Physical benefit: Strengthens the immune system and can reduce the risk of respiratory infections.
Bifidobacterium longum:
Mental benefit: Improves memory and cognitive function through the production of beneficial short-chain fatty acids.
Physical benefit: Supports healthy aging and digestion by reducing gut inflammation and promoting regularity.

Homemade Creamy Probiotic Yogurt
Ingredients
Instructions
- If your A2 milk isn't pasteurized, you will need to heat it up over medium-low heat until it reaches 180F/82C. Let cool to 100F/38C. Proceed to step 2.
- If desired, sterilize your jars according to the instructions below.
- Avoid all metal instruments, as they negatively interact with probiotics.
- Mix 2 tbsp of milk, 2 tbsp of yogurt. Add in the sugar and inulin, making sure they are well completely incorporated. Add in the probiotic capsule(s), mixing thoroughly.
- Pour into (sterilized) glass yogurt jars (should take about 5 of them). Wrap the top of each jar with plastic wrap, being careful not to touch the mixture with the plastic.
- Set the yogurt maker to 98F and 42 hours.
- When the timer goes off, put the yogurt into the fridge for 8 hours before switching the wrap for the lids. DO NOT put the lids on right out of the yogurt maker, as fermentation produces gas and takes time to stop completely.
Nutrition Facts
Calories
106Fat
0 gSat. Fat
0 gCarbs
19 gFiber
6 gNet carbs
14 gSugar
4 gProtein
7 gSodium
3 mgCholesterol
0 mgCalcium
21 mgCholine
28 mgFolate
179 µgMagnesium
46 mgPotassium
239 mgVitamin B12
0 µgVitamin B6
0 mgVitamin K
1 µgCopper
0 mgManganese
0 mgVitamin B2
0 mgVitamin C
0 mgZinc
1 mgSelenium
2 µgVitamin B1
0 mgVitamin B5
0 mgVitamin E
0 mgVitamin A
13 IUVitamin B3
0 mgVitamin D
0 µgIron
2 mgThe nutritional information provided on this blog is for general informational purposes only and is based on data sourced from the US Department of Agriculture database. However, nutritional values can vary significantly depending on the specific brands, ingredients, and measurements used in your preparation. We strive to provide accurate information, but we make no guarantees regarding the accuracy, completeness, or reliability of any nutritional information presented.
Please note that the recipes and nutritional information provided are not intended to replace professional dietary advice or treatment. Always consult with a qualified healthcare professional or nutritionist before making any changes to your diet, especially if you have any underlying health conditions or dietary restrictions.
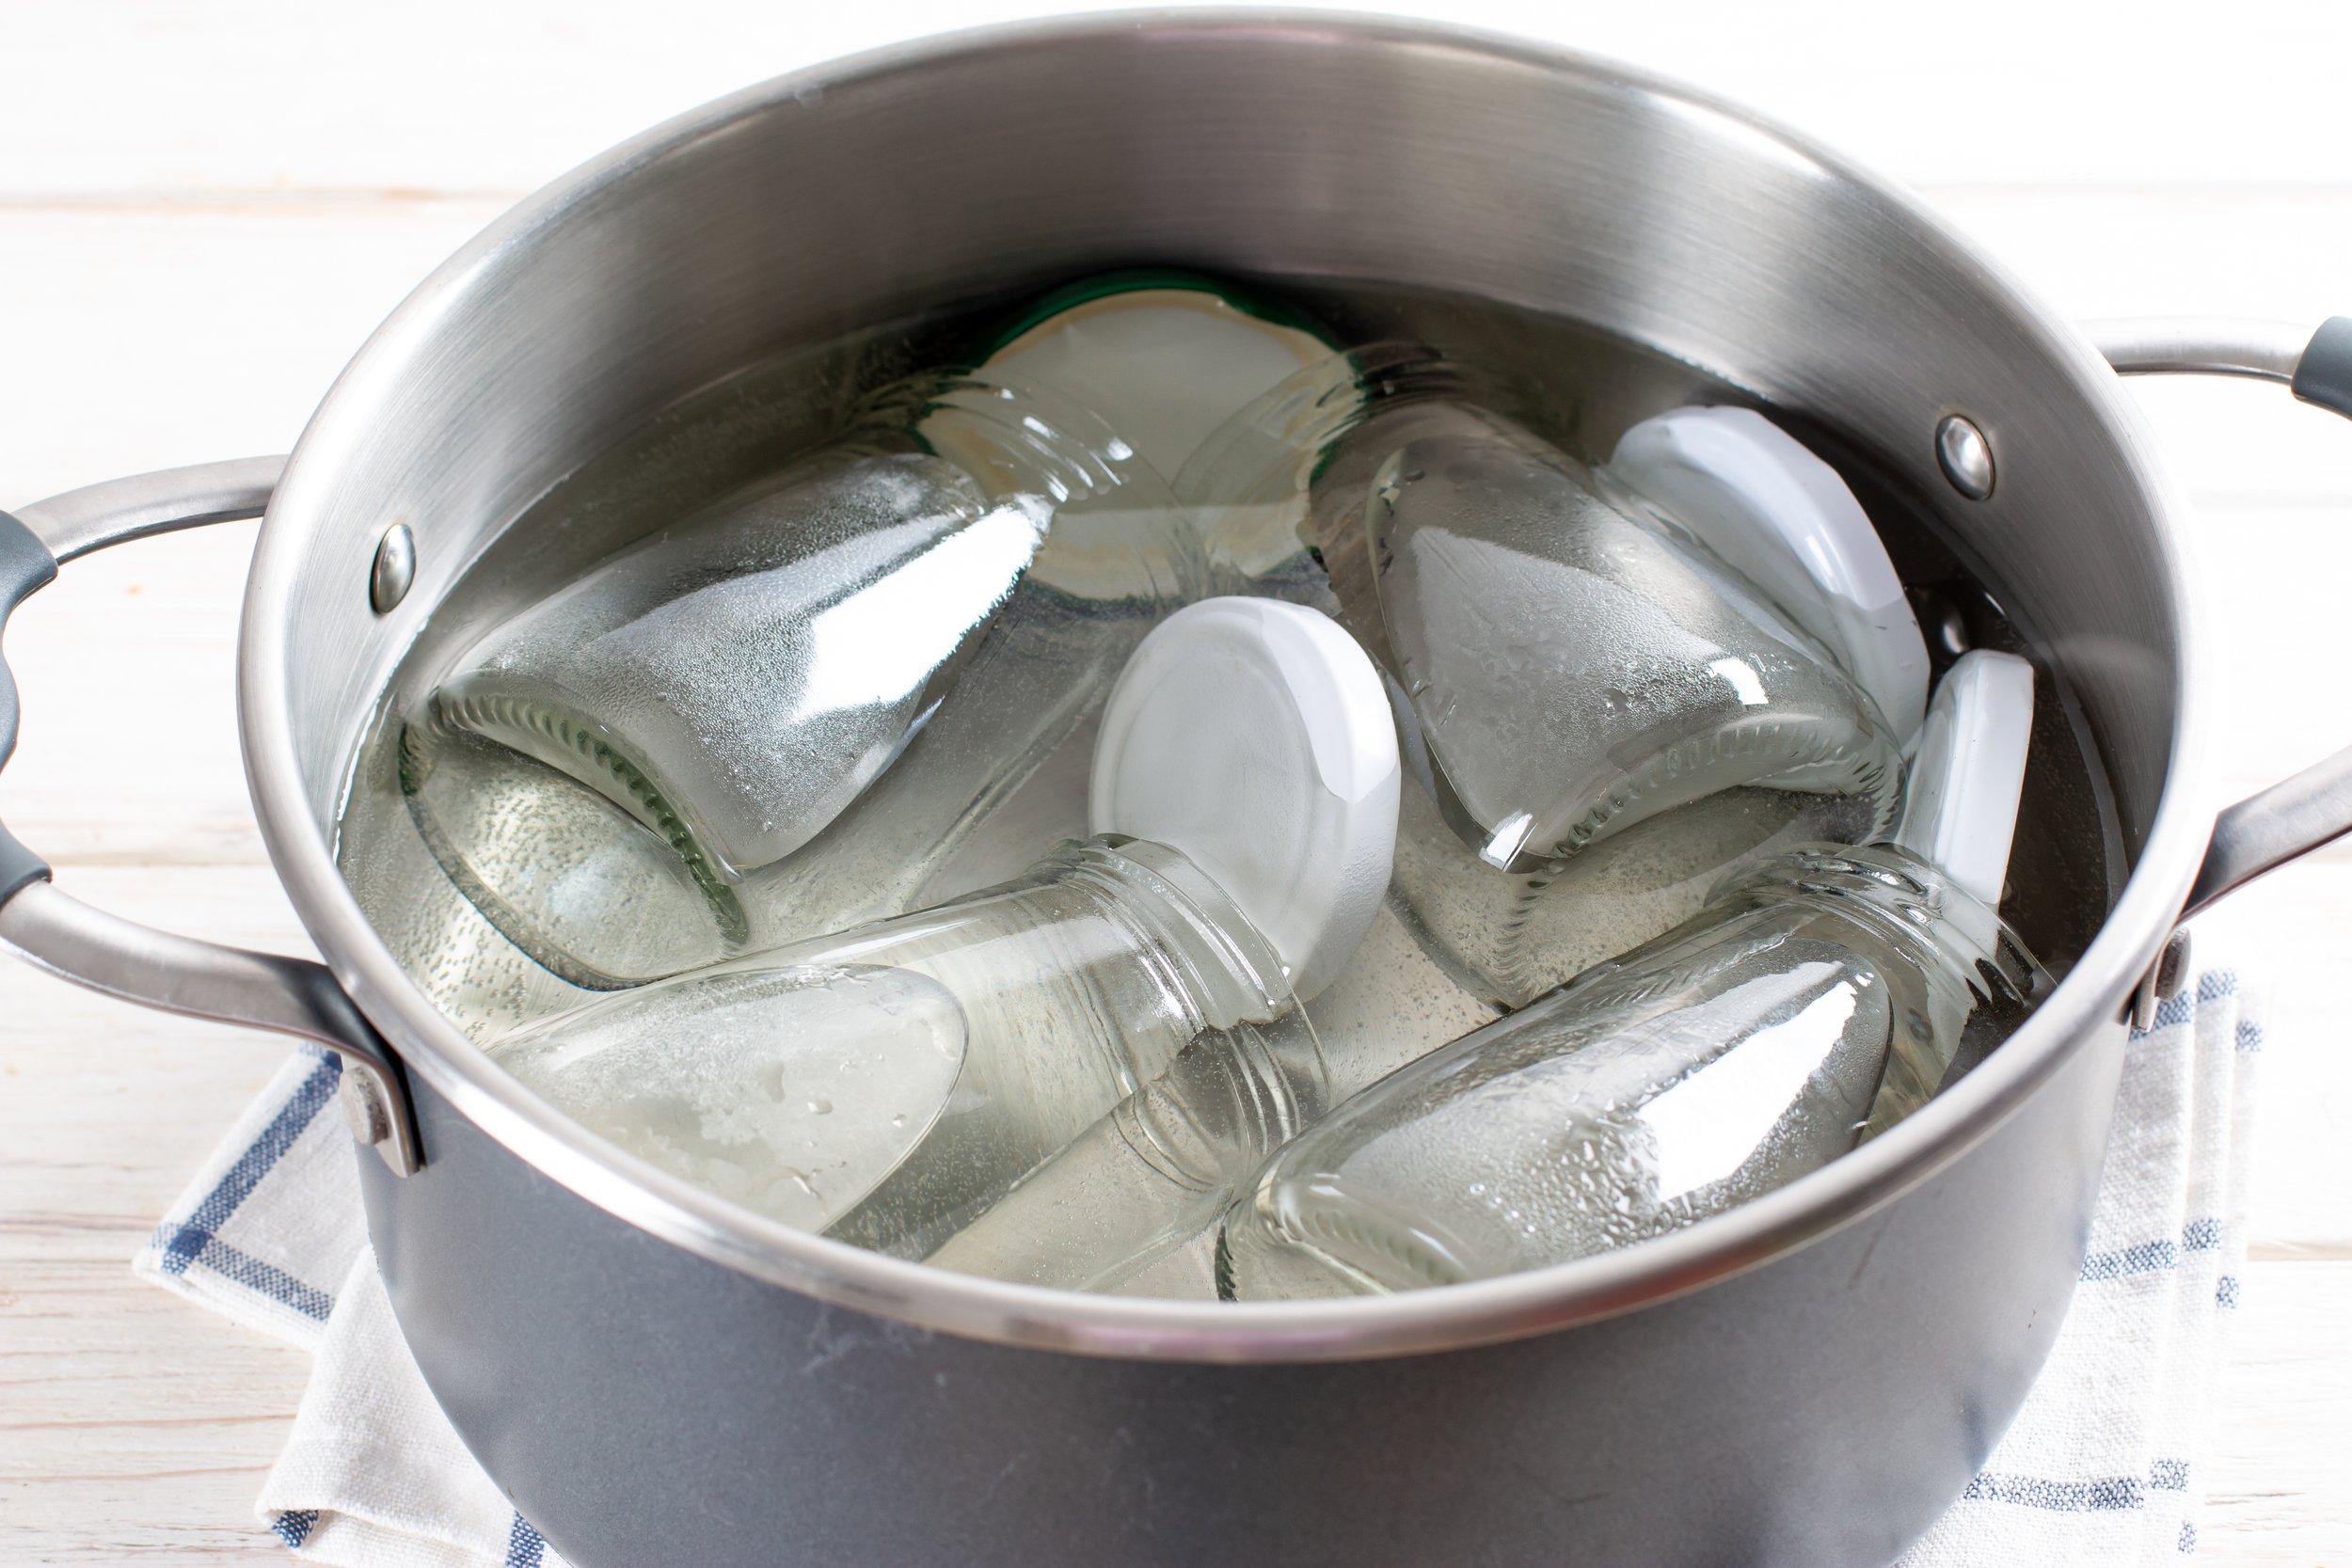
Steps to Sterilize Jars:
Wash the Jars and Lids:
Start by washing the jars and lids with hot, soapy water. Scrub them thoroughly to remove any residue or debris.
Rinse well with hot water.
Be sure to let the jars air dry.
Following these steps will help ensure that your jars are properly sterilized and ready for homemade yogurt making!
Boil the Jars:
Place the clean jars (without the lids) into a large pot.
Fill the pot with enough water to completely submerge the jars.
Bring the water to a boil over high heat.
Once the water is boiling, let the jars boil for 10 minutes. This will kill any bacteria or mold spores present.
Sterilize the Lids:
While the jars are boiling, place the lids in a separate smaller pot or bowl.
Pour boiling water over the lids and let them sit for 5-10 minutes. Do not boil the lids directly, as the rubber seals can be damaged by prolonged boiling.
Dry the Jars:
After the jars have boiled for 10 minutes, use sterilized tongs to carefully remove them from the pot.
Place the jars upside down on a clean dish towel to air dry. Do not use a regular kitchen towel to dry them, as it can introduce bacteria back into the jars.
Use the Jars Immediately:
Once the jars are dry, they are ready to use. To maintain sterility, avoid touching the inside of the jars or lids with your hands.